Seed Packets
Spring is just around the corner and it’s a great time to dust off those seeds from last year or pick up some new ones and start them indoors. A few plants that are easy to start indoors in Alaska are Kale and Zinnias.
It’s always nice to plant some veggies to eat and kale can be very useful to cook with in stir fry, soups, to use in salads, or bake into kale chips. It grows quite happily and large in long Alaska sunny summer days. Zinnias are easy to grow and bring lots of bright color to your home and garden once transplanted outside.
Start your kale seeds indoors 4-5 weeks before the last frost. It can be ready in just 40 days and does well in cooler temperatures. It can be planted outdoors as soon as the soil can be prepped and warm in the spring.
You may want to use a grow light to start your zinnia seeds indoors or keep them in a sunny spot in a warm room.
INSTRUCTIONS
1. Cut a piece of watercolor or mixed media paper to 5.5” x 7”. You will use this to make a seed packet envelope. Make a ½” border on 3 sides.
2. To create a ½” border measure ½” in from left edge on the top and make a small pencil mark.
3. Measure ½” in from the left edge on the bottom and make a small pencil mark.
4. Use a ruler to draw a vertical line connecting the two pencil marks.
5. Measure ½” down from the top edge on each side and make a small pencil mark.
6. Use a ruler to draw a horizontal line connecting the two pencil marks.
7. Measure ½” up from the bottom edge on each side and make a small pencil mark.
8. Use a ruler to draw a horizontal line connecting the two pencil marks.
9. Now go back to the left edge of your paper and measure 3 ¼” from your ½” vertical line.
10. Draw a dot at the top and bottom 3 ¼” from the vertical ½” line and use a rule to connect the two dots.
11. You are doing this to make ½” flaps on 3 sides of your paper that can be folded over to make the seed packet.
12. Since you only need flaps on 3 sides and only half of the seed packet needs flaps you can cut off the ½” rectangle on the top and bottom of the ride side of your paper. (If you’re confused check the attached images). Also, you can ultimately make the seed packet envelope any way or size you want but this is just a guide to help you make a nice sized seed packet.
13. There will also be two ½” squares on the left top and bottom of your seed packet that you can cut off.
14. Once you have your flaps made, if you like you can round the corners of the ½” flaps, this isn’t crucial for any reason other than it looks cute.
15. Once your flaps have rounded corners you can fold the right side of your paper over to the ½” vertical line. This makes a nice little packet that is 3 1/4” wide.
16. Next fold the left flap and bottom flap over to make a little seed packet envelope. Leave the top flap up and open for now.
17. Glue the left flap and bottom flap over the top of your folded 3 1/4” packet.
18. This should give you a nice little seed packet to draw and paint on.
19. Choose your favorite seeds, I chose to use kale and zinnias, so I made two seed packets. Just repeat the above steps if you want to make more than one seed packet.
20. Next look up images of your plant in books, online, or use a real seed packet from your local greenhouse as a guide.
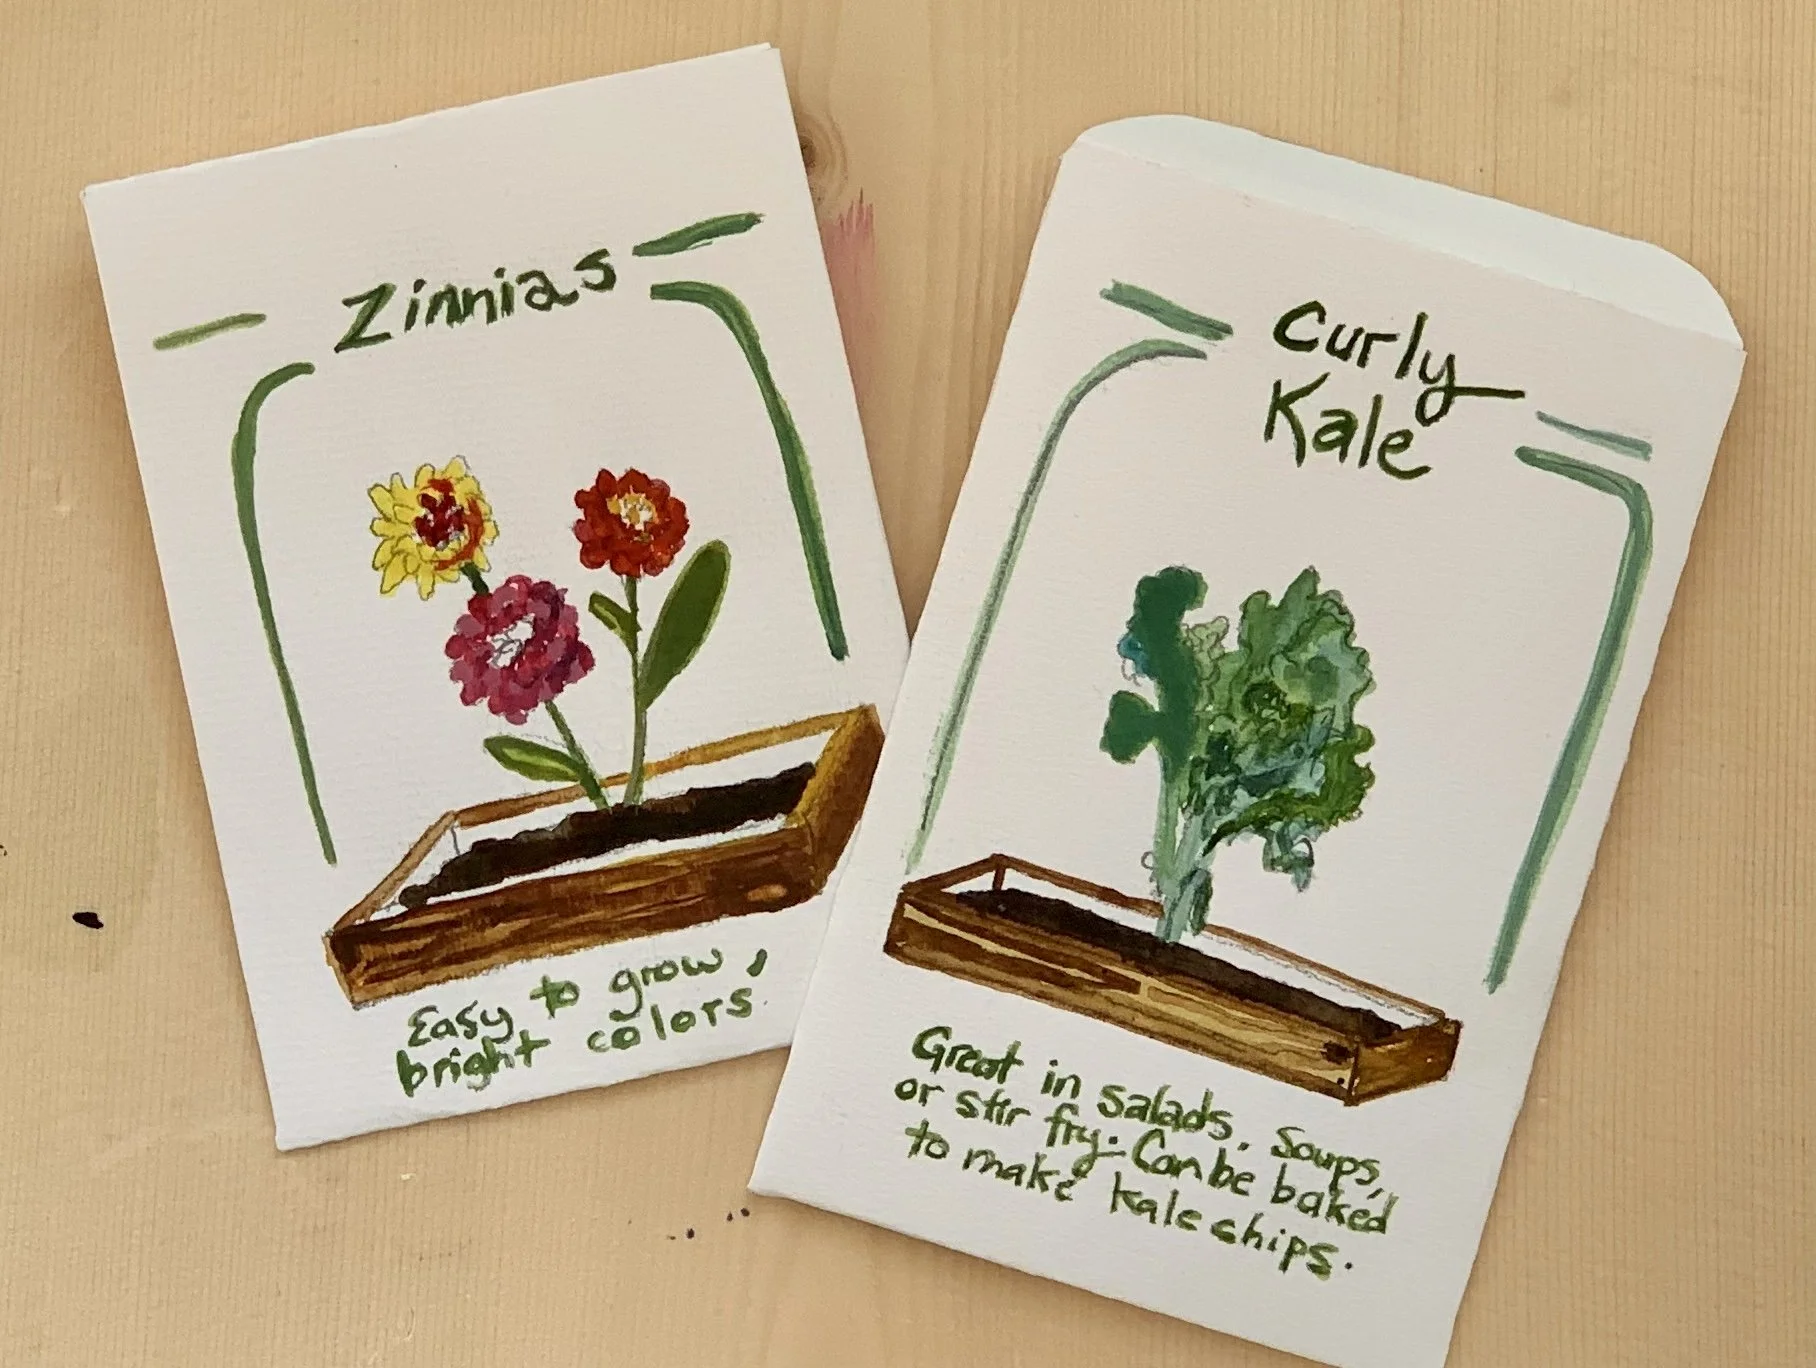
21. Draw a picture of your plant on the front of your seed envelope.
22. Leave some space to add text such as the name of your plant, the growing needs, and descriptions. Write these in pencil on your seed packet. You can also include any details about water, planting instructions, sunlight etc. on the back of the packet with a pencil.
23. Add details to make your seed packet interesting, maybe a raised garden bed or container for your plant, or a picnic table or bucket with your plant on it.
24. Add some border lines or something decorative of your choosing to make your seed packet stand out. I added just some simple horizontal lines above the plant name, and a few curved lines to reference a trellis or plant stakes.
25. Once you have a design you like, use watercolors to paint your seed packet plants. If you want to try painting over the pencil text you can, it can be useful to use a small liner brush for this if you have one.
26. Next use watercolor paint to add any detail lines or containers.
27. Fill your seed packet with extra seeds from a packet you bought to share with a friend or store for next year.